Create a certificate from the Windows CA
Introduction
For lab environments or internal web servers, it’s not necessary to use a certificate from a public Certificate Authority. Instead, you can use certificates issued by your own Windows Certificate Authority. All workstations and servers joined to the domain will trust these certificates. If you import the root certificate of the Windows Certificate Authority, standalone servers, workstations, and Linux servers will also trust these certificates.
This blog provides guidance on setting up the Windows Certificate Authority infrastructure and creating new certificates.
Install the Windows CA
To install the Windows CA on a Windows server, you can execute the following PowerShell commands:
Add-WindowsFeature Adcs-Cert-Authority -IncludeManagementTools

Install-AdcsCertificationAuthority -CAType EnterpriseRootCA
Before running these commands, you must meet the following prerequisites:
- The server must be a member of the domain.
- The server must have a static IP address.
- The user running the command must be a member of the Enterprise Admins and Domain Admins groups.
One-time steps
The following one-time steps are required before you can create a certificate:
1. Duplicate the web server certificate template, ensuring that the “Allow private key to be exported” option is enabled. This is necessary because the default web server certificate template does not have this option enabled.
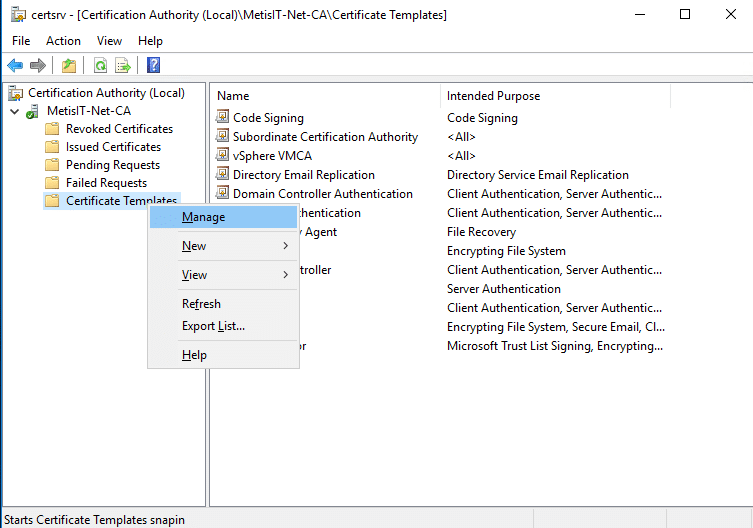
- Start Certification Authority, go to Certificate Templates, right click, Manage
- Select Web Server, right click, Duplicate Template
- Go to tab General and change the Template display name to Web Server exportable
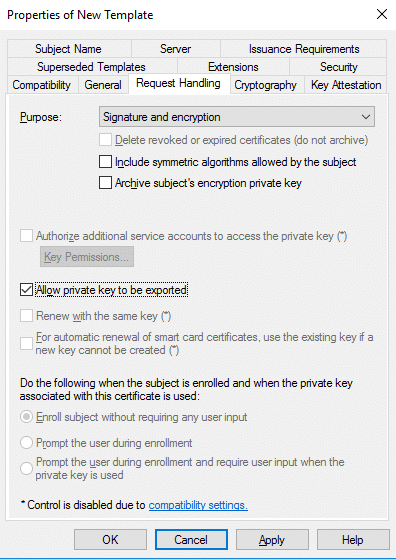
- Go to the tab Request Handling and select Allow private key to be exported
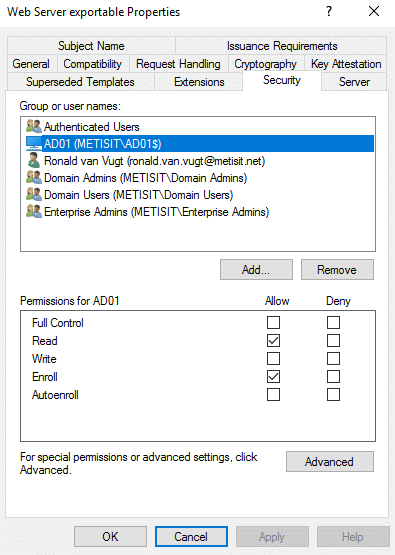
- Go to the tab Security, add the computer that will issue the certificate request and give this computer the permission Read and Enroll
- Press OK
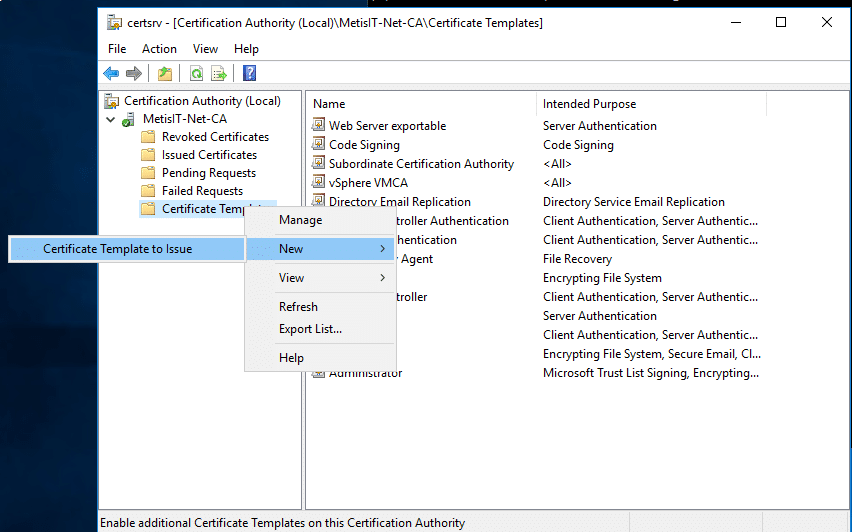
- Right click Certificate Templates, New, Certificate Template to Issue, select Web Server exportable and press OK
2. Export the root certificate of the CA and import it to all standalone workstations and servers that will use the newly created certificate.
- Start Certification Authority, select the Certification Authority Server, select Properties
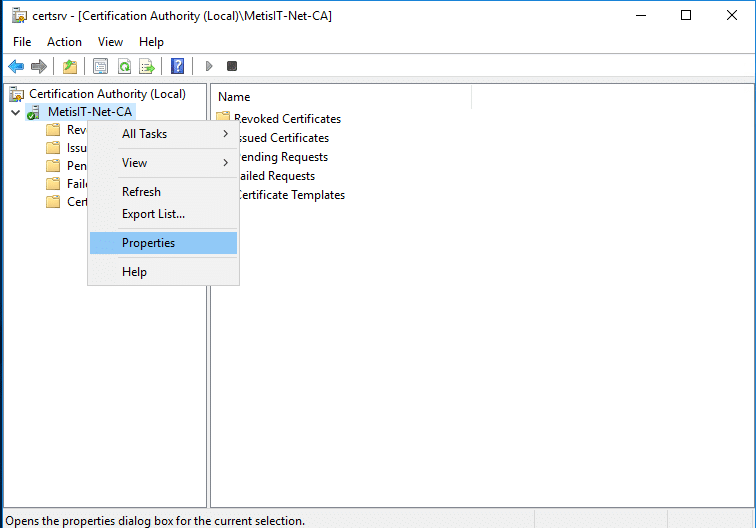
- Select the CA certificates and press View Certificate
- Select the tab Details and press Copy to File …
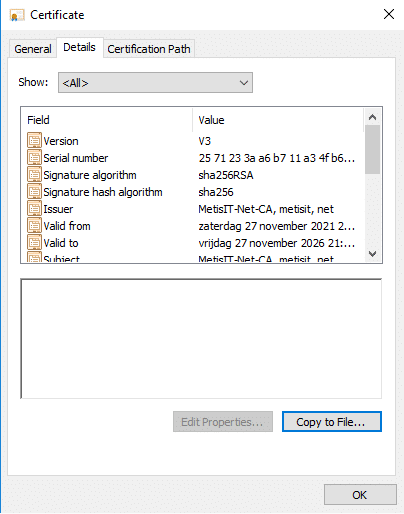
- Follow the wizard to export the root certificate. For Windows machines, you will need the DER encoded binary X.509 format, while for most other machines, you will need the Base-64 encoded X.509 format.
- Import the root certificate to standalone servers and workstations
Steps to create a new certificate
These steps are required to create a new certificate:
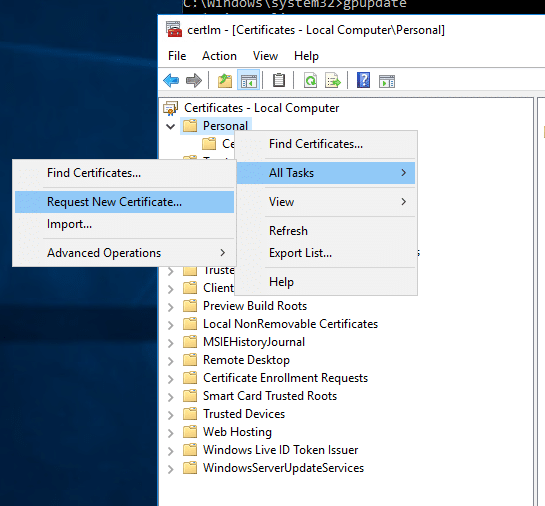
- Start certlm.msc to create a new certificate. (If you perform this action on the computer that requires the certificate, there is no need to export and import the certificate)
- Go to Personal, right click, All Tasks and select Request New Certificate …
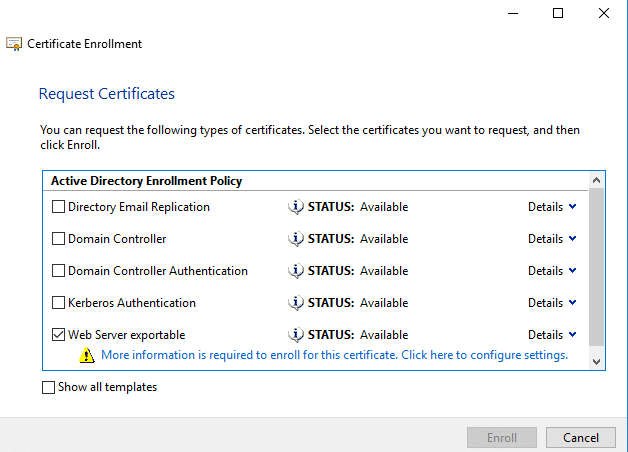
- Press Next and Next again
- Select the template Web Server exportable and press More information is required to enroll for this certificate. Click here to configure settings.
To properly configure the certificate for a website, it is essential to provide at least the following information for the certificate:
- Common Name: the domain name of the website
- DNS: all Subject Alternate Names, including the Common Name; modern browsers require SANs to be specified explicitly in the certificate
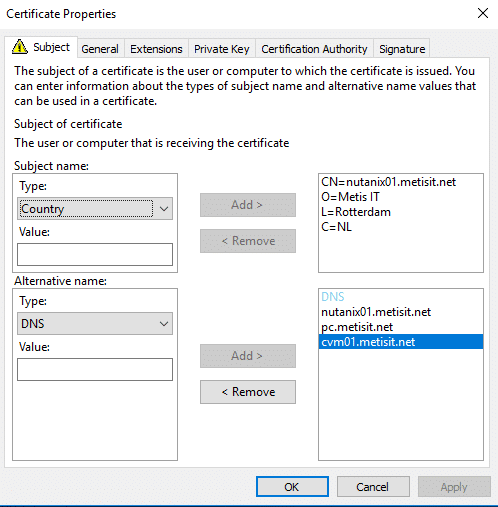
- Press OK, Enroll and Finish
- The certificate is now stored on the local computer
- You can export the certificate to import it on another computer: right click, open, tab Details and select the button Copy to File … Follow the wizard and select Yes, export the private key (you usually need the private key)
- You now have an exported certificate in PFX format , which includes both the public and private parts.
How to split the certificate in a public and private part
Sometimes, it is necessary to split a certificate in PFX format into its private key and certificate/public key parts. This can be done using OpenSSL. You can download OpenSSL for Windows from https://slproweb.com/products/Win32OpenSSL.html.
Get the file with the private key (open the Win64 OpenSSL command prompt to execute these commands):
openssl pkcs12 -in <file.pfx> -nocerts -nodes -out private.key
Get the file with the certificate and public key:
openssl pkcs12 -in <file.pfx> -nokeys -clcerts -out certificate.pem
Conclusion
With the proper preparation, it is highly feasible to set up a personal Certification Authority in Windows, which allows for easy deployment of certificates for internal services and use within a lab environment. This can provide secure communication at no cost within the internal infrastructure and lab.
Deel dit bericht
Configure Nutanix resources with Ansible
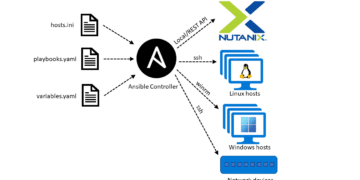
Introduction Infrastructure as Code (IaC) is an IT infrastructure management approach that emphasizes the use of code to automate the provisioning, deployment, and configuration of infrastructure resources. The goal is to treat infrastructure as software,
Lees meerConfigure automated enrollment Remote Desktop SSL certificates
Introduction This blog describes the actions to take to configure auto-enrollment of Remote Desktop Connection computer certificates issued by your local CA server instead of using a self-signed Remote Desktop certificate. We will also investigate
Lees meerMicrosegmentation, A secure and agile wall around your most valuable assets
Microsegmentation, A secure and agile wall around your most valuable assets Introduction In today’s world where every little thing is connected to the web and everything is interconnected, securing computer networks is of very importance
Lees meer